Category Archives: Natural Kids

Build a Lego Christmas Tree Decoration | Photos and Instructions Included!

Boys, girls, young, old, most everyone can enjoy the plastic building blocks that are Lego.  While it might be a bit unnatural to speak so highly of plastic toys, they’ve become so well loved in our little natural family, it would be almost criminal of me to look at them that way at this point!  So, instead we just enjoy them for what they are – an exploration in creativity, engineering skills, math, following instructions – and plain old FUN!!!

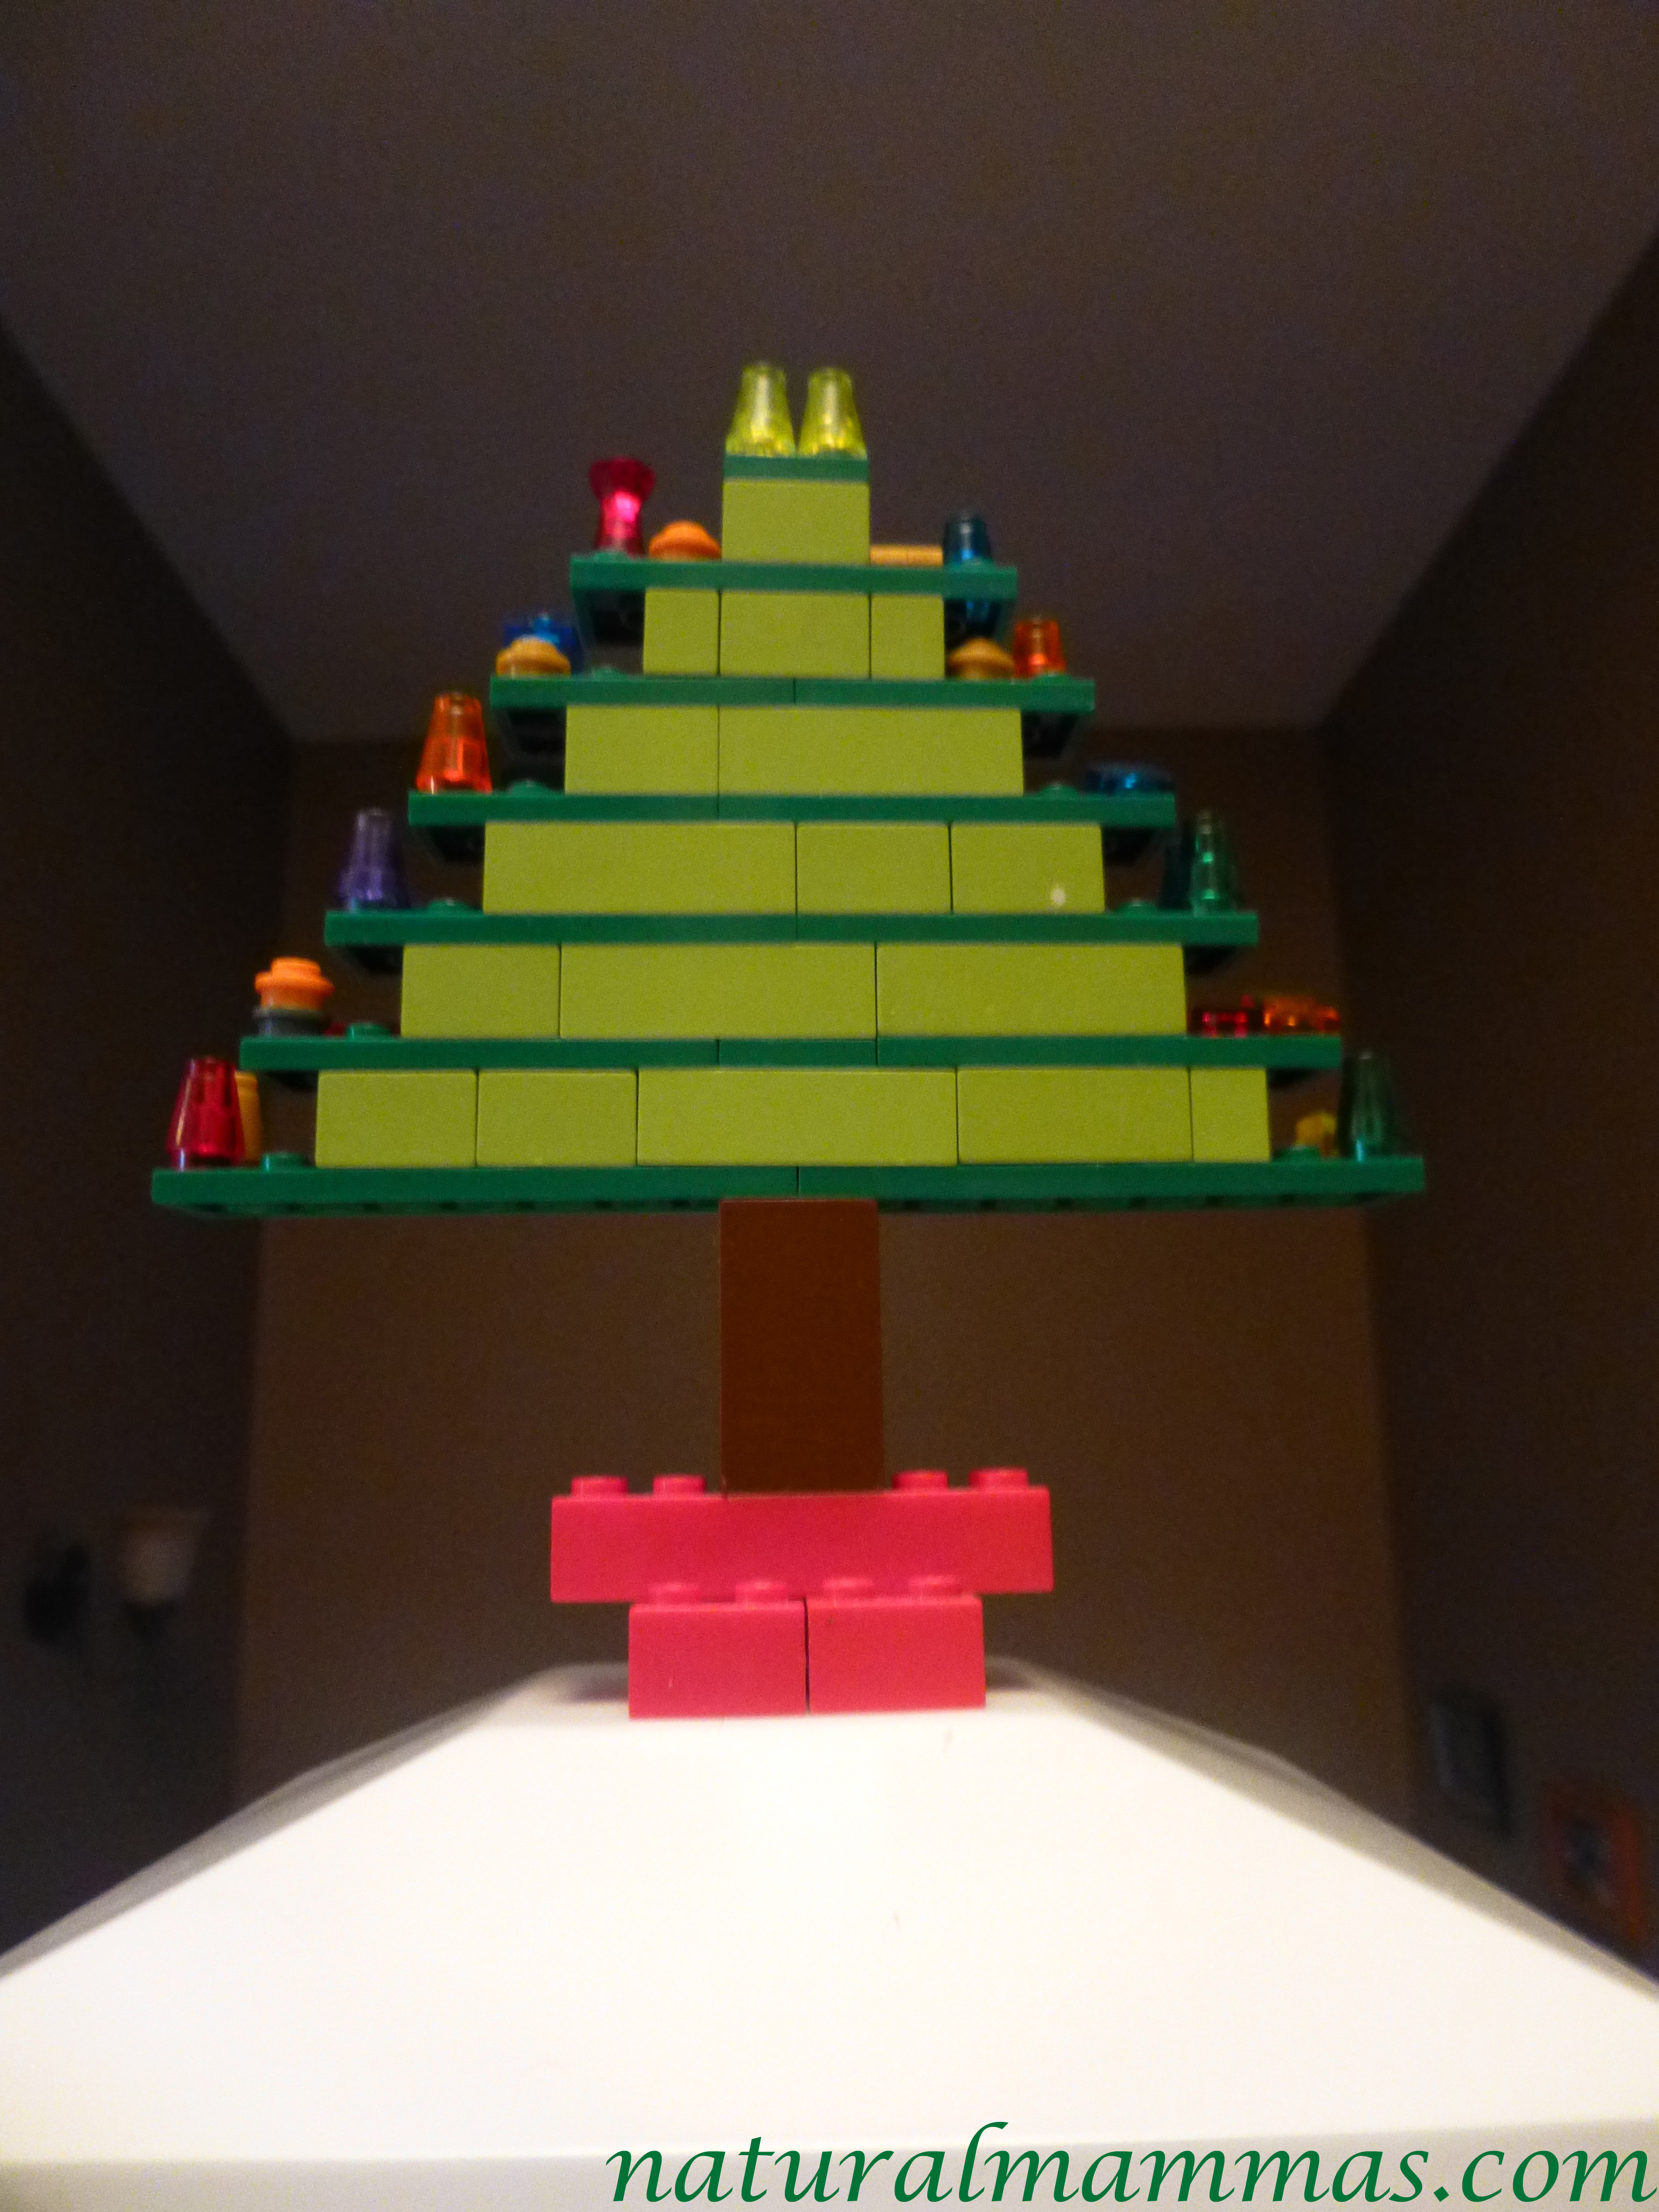
Generally you can find the three boys, their dad, and I building projects like cars, “bases”, ships, and things like this.  This Christmas though, we all decided we’d make a Lego Christmas Tree decoration.

It’s easy enough, but, it did take a bit of planning and a lot of digging for just the right pieces.  In the end – we all thought our Lego Christmas Tree turned out pretty cool –  if I might share my totally biased opinion!  So cool in fact, I thought some other natural kids and their families out there might like to know how we did it.


Lego Christmas Tree Decoration Building Instructions

Basically, you just need a configuration of green that works within the pieces you have.  What’s shown on the list of bricks shown below is what we used to make our tree so you can get an idea of what you need to find.  From here, get creative and make it your own custom Lego Christmas Tree decoration!

Pieces List

Here’s a list of bricks needed to build your own Lego Christmas Tree decoration with (or for!) the natural kids in your life.
The Base
  • 2 x 8 stud bricks in red
  • 1 x 10 stud brick in red

The Trunk

  • 4 x 4 stud bricks in brown (or one brick that stands that high if you have it)

The Tree

  • 2 x 16 stud flat bricks in dark green
  • 6 x 12 stud flat bricks in dark green
  • 3 x 8 stud flat bricks in dark green
  • 2 x 4 stud flat bricks in dark green
  • 5 x 8 stud bricks light green
  • 1 x 6 stud brick light green
  • 8 x 4 stud brick light green
  • 3 x 2 stud brick light green
  • 4 x yellow cones
  • miscellaneous studs and cones to make lights/ornaments

What to Do

First, assemble your base.

lego christmas tree instructions step one - the base

Next build your trunk and place it in the center of the base.

lego christmas tree instructions step two the trunk

Now, Place your two 16 stud flat dark green pieces end to end, with each brick having two studs a piece on the trunk to anchor it.  Be careful, it’s not strong at first, but, it’ll get there!  As you can see we started adding our ornaments and lights as well – but only on the last 4 studs on either end of the dark green flat pieces.

lego christmas tree instructions step three the first branch

Next, take two 4 stud bricks, one 8 stud brick, one 6 stud brick and, one 2 stud brick all in light green place them on top of the dark green bottom you just made leaving four studs open on either side of each 12 stud brick for the ornaments and lights.

lego christmas tree instructions step four another branch

Take two of your flat 12 stud dark green bricks, along with one 4 stud dark green brick and lay on top of the light green bricks you just put down.  Each 12 stud brick will over hang the light green layer by two studs.  The 4 stud dark green flat brick will then go in the middle.

lego christmas tree instrucitons step five more branches

From here, continue like this in rows of dark green flat bricks and light green bricks always leaving 4 studs on each side of the dark green pieces when applying the light green bricks, while overhanging the light green with the dark green bricks by 2 studs on either side. This will help make your reduce your evenly until you get to the four flat dark green brick for the top.

lego christmas tree instructions step six the top

Now add the four yellow cones for the star (or other idea for a star!) and the ornaments if you haven’t already.

lego christmas tree instructions step 7

 You’ve now got a lovely Lego Christmas Tree decoration to add to all your others, or, this can make a very fun gift.  Just write out the instructions and brick list and give as a homemade kit.    And, don’t forget to put your own spin on the tree.  You can make these smaller, larger, and anywhere in between and as always, with Legos, the best designs are the ones you make yourself!

lego christmas tree decoration on shelf

Why Simplicity Often Prevails in the Natural Toy box

Don’t worry. This isn’t one of those posts that goes on and on about how you HAVE to buy wooden and natural toys and how all plastic toys are bad, bad, bad. Okay, well maybe there is a hint of that, but really I just had to share my fascination and complete surprise over the popularity of a truly simple toy that entered our semi natural home this year and how it reminds me that simplicity and toys go very well together.

To squash all ideas that I have ALL natural toys in my home, I would like to assure everyone that there are plenty of plastic toys to be found in our abode. We actually have two small bins of miscellaneous plastic crap that I like to believe accumulates in everybody’s house. Then we have nicer plastic items, many purchased second hand, ranging from an educational cash register to a huge box of animals and the beloved Strawberry Cafe and even Diego’s Tree House.  So as you continue to read this, know that I go for balance over zealousness.

The simple toys that I have seen playing more roles in our house than any other? The Pegs and Cups. Who would of thought, right? Even when I was purchasing this item from Urbanhomesteaders on Etsy, I was thinking, “Am I just throwing 15 bucks away?” Well, while they obviously weren’t the highlight of Christmas morning, they have served more roles in playtime than you can imagine. And I have no doubt they have a lot more roles to play.

simple toys for kidsThese little pegs and cups have been used for simple sorting and color matching, they have been friends of the gnomes and a family all on their own, they have been nail polish, perfume, a million other sprayers and creams used in a variety of scenarios and as you can tell in some photos, even the dog found a way to love this natural toy (the kids could care less that one is chewed and obviously it was not purchased in that condition). I have found these little cups in the play kitchen, in doctor kits, in dollhouses, spread out on tables and well, everywhere. Smaller children come in to the house and immediately start to put pegs in and out of cups.

I often reflect now on what makes these toys and similar ones we have that are timelessly popular so much fun and I think it is the fact that they are so very simple. There is no flashing light or strange sound confusing the situation. These toys are only what the child’s imagination wants them to be and this gives a sense of accomplishment that makes for happy confident children. Curious by nature, children presented with a clean slate can make great things happen. Don’t believe it? Just give them a blank piece of paper and see what they can create.

I try to be conscientious of the items I place in the play area. Again, balance over zealousness. When looking at a toy I often ask myself, does this toy encourage imagination? Will my child interact with this toy or will the toy interact with my child? Then I move down the list of can I buy it used or is there a natural alternative to this item. The more a toy does, the less a child must do; keep your toys simple and set your child’s mind free.

I would love to see some of your favorite toys and hear about what makes them popular at your house.

Instructions For Reusing Your Old Crayons That Are Fast, Easy, and FUN!

Let’s face it crayons are lots of fun, affordable, and can be wonderful mediums for artistic expression of many kinds, but, they never get all used up.  Never EVER!  Have you ever met someone who has used up an entire crayon?

Nope.

Instead, there are always poor discarded crayon pieces floating around.   Broken, or used down to the nub they sit, all alone.  Still useful yet not really….until now!

Here are some easy to follow instructions (and lots of pictures!) to help you reuse your old crayon bits and give them new life!  The kids can help and everyone will have fun while you clear out your old crayons and make room for all these earth friendly, and Free new ones you can all enjoy making together!


Here’s What You’ll Need:

  • Old Crayons
  • Knife (preferably one you don’t care much about)
  • Cutting Board (again, not your favorite one!)
  • Molds  ~ These instructions show a heart shaped silicone candy mold because we made them for Valentine’s Day gifts, but, you can use any other shape or type of mold that can go into the oven.

And Here’s What You’ve Gotta Do:

First, gather up all your old crayon bits and peel them.  Use a knife to slit up the paper to make this quicker.  Peeling regular style with your trusty old hands isn’t really that big of a bother though and would be the only way for the kiddos as the knife can slip.


peeled crayons ready for reusing


Next, you’ve got to decide why type of crayons you want to make, multi-color or solid.  If you want to make multi-color reused crayons then just throw all the peeled crayons into a pile.  If you’re going for solid or at least nearly single color (say all the lighter greens together) then sort them now and separate each color into its own container.

Now, chop up the crayons into smaller bits.  You don’t need them too small but if they’re too big they’ll take longer to melt.


chopped crayons for reusing


Put your chopped up crayon pieces into the mold you’re using.  If you’re making multi colored crayons you could also just put them into a big bowl at this point then divide them into the molds when you’re all done with chopping if you prefer.

As you can see with these instructions then chopped up crayons in the photo are the same basic color (all various shades of orange) but not just one solid color.  They still went straight into the mold to keep them separate and clean while chopping all the other crayon colors.


reused crayon pieces in molds


Preheat your oven to 230 degrees.  Then, once you’ve got all the chopped crayon pieces situated into the molds put the mold onto a cookie tray and put the tray and the mold into the oven.

Bake for about 15 – 25 min or until all the crayon pieces seem to have melted.  The total time they spend in the oven will depend on the size of the mold you used.  When they’re done, they’ll look like this…


reused crayons all melty and just out of the oven


Take the melted crayons out of the oven and let them cool in the mold for about 30-45 min.  Again, the larger your mold size the longer until the new crayons you’ve made will be cool.  Once the molds are cool to the touch, pop out your reused crayons and enjoy!


reused crayons finished and in a rainbow of colors


Making these earth friendly crayons is fun for the whole family, and can be a fantastic project for church groups, art classes, day care centers  and other places where poor old useless crayon bits linger.

Also, you can bag a few of the finished crayons up and they make great green gift ideas for kid’s birthday parties, Halloween, Valentine’s Day, Christmas and more!

Hope you enjoy these instructions for reusing your old crayons, and let us know how the project goes!