 I am probably what you would call a born again natural mamma. At one point early in life I was way more natural than I am today and at some point in between I indulged in many modern conveniences with a tiny bit of admitted disregard. Being able to admit this is the first step to recovering some dignity. One arena in our house that was hard to wrestle back into shape was the lunch packing department and my struggle continues even today.
For the longest time, well for about 5 years, it was only my hubby and me and he packed his cooler everyday with weird blue ice packs from the freezer, plastic sandwich bags galore and usually a boat ton of soda (cause he used to be a soda fanatic). These were those aforementioned years of modern and wasteful conveniences that I or more representatively, we indulged in. I never paid much mind to the way he was filling his own lunchbox.
Once we had our first born, I started to notice what we were using and even more importantly what we were wasting money on to pack lunches and snacks. Immediate changes were made. We purchased stainless steel canteens for water, gave up soda, saved containers to re-use and eliminate the need for plastic bags and just made adjustments to do better by ourselves, our wallets and the environment.
We improved upon our lunch packing skills as the years, but here we are 5 years after our first was born and she is heading off to school each day with a packed lunch and once again, I was faced with challenges of keeping waste down, lunch items cold and a new added twist of dealing with “image” in the lunchroom. I am using “image” for lack of a better word, but we all know kids can be cruel and when you are on your first solo socialization adventure the pressure can be a bit much at times and lunch shouldn’t be one of those times.
I have been looking around at options to better green our lunch process for our Kindergartener. For starters, she likes her lunch cold. If her organic yogurt is warm, she won’t eat it. So, I didn’t really want to go with those weird lunch ice packs filled with, well actually I don’t know what is inside of them, so I discovered that I could make cute little tubes filled with dried feed corn (kind of like a corn bean bag?) that when frozen keep their cool long enough to keep her lunch chilled; easy enough.
 Next was finding the right containers for holding snack size portions. We pack a lot of organic black olives, grape tomatoes, baby carrots and other live fruits and veggies as well as rice snack mixes, yogurts and the occasional natural cheese puffs. So the trouble with re-using product containers and packing a lunch box is size. To get a lot of snacks into a manageable size lunch bag, your containers have to be the right size. We did buy some BPA free plastic small Tupperware and they work well. In my search though I did come across these stainless lunch containers, from Eco-Lunchbox, that are pretty cool too. For us they weren’t in the budget at the time, but I still go back and look every now and again.
The next goal was to find reusable bags for some snacks to fill in those spaces between containers, but still not use plastic. After the first round of pricing, I was like okay…guess we’ll be making those and I found these great instructions for making reusable snack bags. But as a work from home mom, the time to craft my own never arrived so I finally broke down and looked again and found some that I really like and I think are reasonably priced on Etsy.
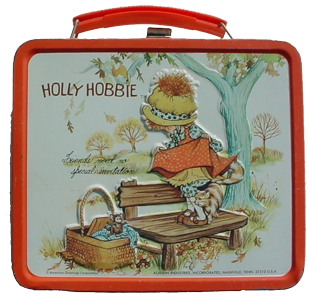
That is all the further I have come, so far. I am sure there is more I could be doing. So share your thoughts on greening the lunch packing experience and I guess I never said that we already use a cloth lunch bag and actually I still have my cloth lunch bag from when I was in school. It is a totally rockin’ 80s design, but I couldn’t convince my daughter to use it. For now, be green with lunch on the scene!


