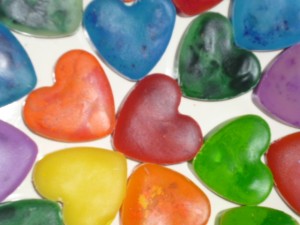
Let’s face it crayons are lots of fun, affordable, and can be wonderful mediums for artistic expression of many kinds, but, they never get all used up. Never EVER! Have you ever met someone who has used up an entire crayon?
Nope.
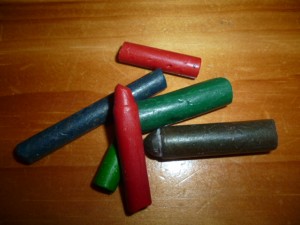
Instead, there are always poor discarded crayon pieces floating around. Broken, or used down to the nub they sit, all alone. Still useful yet not really….until now!
Here are some easy to follow instructions (and lots of pictures!) to help you reuse your old crayon bits and give them new life! The kids can help and everyone will have fun while you clear out your old crayons and make room for all these earth friendly, and Free new ones you can all enjoy making together!
Here’s What You’ll Need:
- Old Crayons
- Knife (preferably one you don’t care much about)
- Cutting Board (again, not your favorite one!)
- Molds ~ These instructions show a heart shaped silicone candy mold because we made them for Valentine’s Day gifts, but, you can use any other shape or type of mold that can go into the oven.
And Here’s What You’ve Gotta Do:
First, gather up all your old crayon bits and peel them. Use a knife to slit up the paper to make this quicker. Peeling regular style with your trusty old hands isn’t really that big of a bother though and would be the only way for the kiddos as the knife can slip.
Next, you’ve got to decide why type of crayons you want to make, multi-color or solid. If you want to make multi-color reused crayons then just throw all the peeled crayons into a pile. If you’re going for solid or at least nearly single color (say all the lighter greens together) then sort them now and separate each color into its own container.
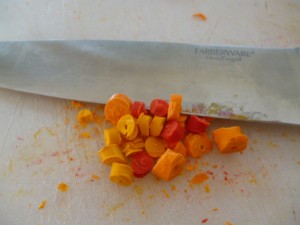
Now, chop up the crayons into smaller bits. You don’t need them too small but if they’re too big they’ll take longer to melt.
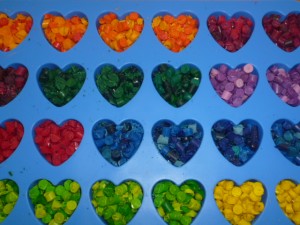
Put your chopped up crayon pieces into the mold you’re using. If you’re making multi colored crayons you could also just put them into a big bowl at this point then divide them into the molds when you’re all done with chopping if you prefer.
As you can see with these instructions then chopped up crayons in the photo are the same basic color (all various shades of orange) but not just one solid color. They still went straight into the mold to keep them separate and clean while chopping all the other crayon colors.
Preheat your oven to 230 degrees. Then, once you’ve got all the chopped crayon pieces situated into the molds put the mold onto a cookie tray and put the tray and the mold into the oven.
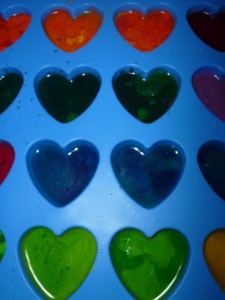
Bake for about 15 – 25 min or until all the crayon pieces seem to have melted. The total time they spend in the oven will depend on the size of the mold you used. When they’re done, they’ll look like this…
Take the melted crayons out of the oven and let them cool in the mold for about 30-45 min. Again, the larger your mold size the longer until the new crayons you’ve made will be cool. Once the molds are cool to the touch, pop out your reused crayons and enjoy!
Making these earth friendly crayons is fun for the whole family, and can be a fantastic project for church groups, art classes, day care centers and other places where poor old useless crayon bits linger.
Also, you can bag a few of the finished crayons up and they make great green gift ideas for kid’s birthday parties, Halloween, Valentine’s Day, Christmas and more!
Hope you enjoy these instructions for reusing your old crayons, and let us know how the project goes!


